Uploading Custom Embeddings#
This guide explains how to upload your own embeddings to Kolena using the Kolena SDK. Please ensure you have the SDK installed. Instructions for installing the SDK are available here.
Step 1: Import the Embedding Upload Function#
To upload embeddings, use the upload_dataset_embeddings function from Kolena. You can import
it with the following code:
Step 2: Prepare the Required DataFrame#
The DataFrame you upload should have:
- Unique Identifier Columns: This is typically the
locatorfield, which serves as a unique identifier for each entry. Could be multiple id fields combined together likelocator+person_id - Embedding Column: Each embedding must have the same size across all rows.
Example code#
Here’s an example where we download the instance-seg dataset from Kolena,
then add a placeholder embedding (a random array):
import numpy as np
from kolena.dataset import download_dataset

dataset = "instance-seg"
df = download_dataset(dataset)
df_embedding = df[["locator"]]
df_embedding["embedding"] = [np.random.random((512,)) for _ in range(len(df_embedding))]
Note
Replace the placeholder embeddings with embeddings generated from your own embedding model.
Step 3: Upload the DataFrame using Kolena SDK#
With the DataFrame prepared, use the upload_dataset_embeddings function to upload it to Kolena.
upload_dataset_embeddings(dataset_name="instance-seg", key="my-embedding-model", df_embedding=df_embedding)
dataset_name parameter specifies the target dataset where the embeddings will be uploaded.
The key parameter is a unique identifier for the embeddings being uploaded, allowing multiple embeddings
to be associated with the same dataset. Finally, df_embeddings is the DataFrame object
prepared in Step 2 that contains the data you want to upload.
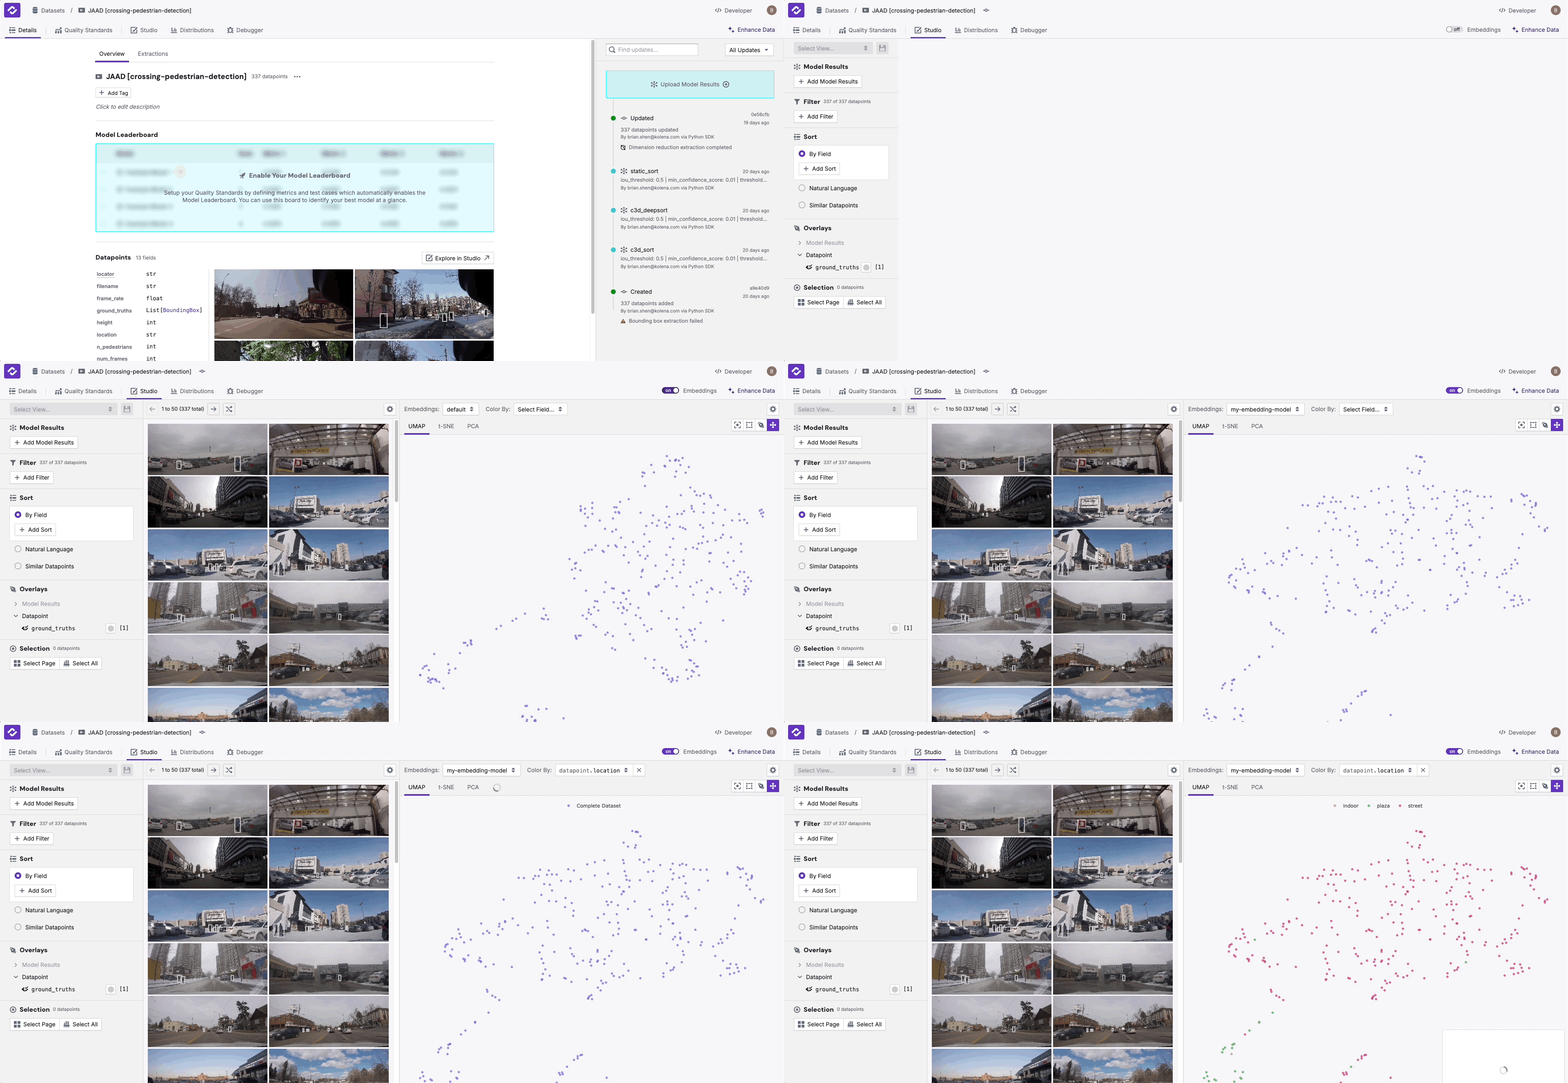
Step 4: Verify Your Embeddings in Kolena Studio#
To confirm the embeddings uploaded successfully:
- Open Kolena Studio.
- In the top right corner, click on "Off" beside the embeddings toggle to enable embeddings view.
- Select the embedding model key saved in the upload function. In the example it was
my-embedding-model. - Choose from the visualization options: UMAP, t-SNE, or PCA.

If you have trouble with creating embeddings, refer to our example code for generating image embeddings and uploading to Kolena.